SEC504: Hacker Tools, Techniques, and Incident Handling
SEC504Offensive Operations


This is a brief tutorial on how to use the Autopsy Forensic Browser as a front end for the Sleuthkit. This tool is an essential for Linux forensics investigations and can be used to analyze Windows images.
We will start with the presumption that you have the Forensic Toolkit Installed (whether through the use of a Live CD such as Helix or if it is installed on a Forensic Workstation). Autopsy is built into the SANS Investigative Forensic Toolkit Workstation (SIFT Workstation) that you can download from forensics.sans.org. You can start Autopsy by clicking on the magnifying glass in the upper right corner.
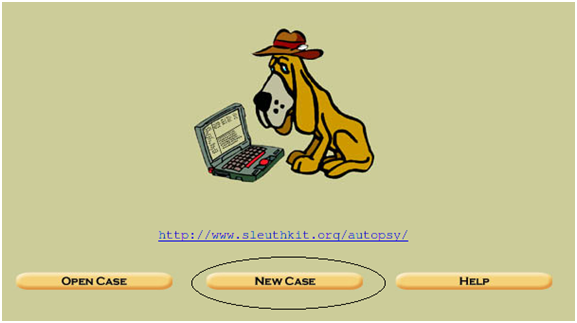
Autopsy is a web based front end to the FSK (Forensic Toolkit). By default, you will connect to the Autopsy service using the URL "http://localhost:9999". The default start page is displayed in Step 2.
Click New Case. This will add a new case folder to the system and allow you to begin adding evidence. To begin, click New Case.
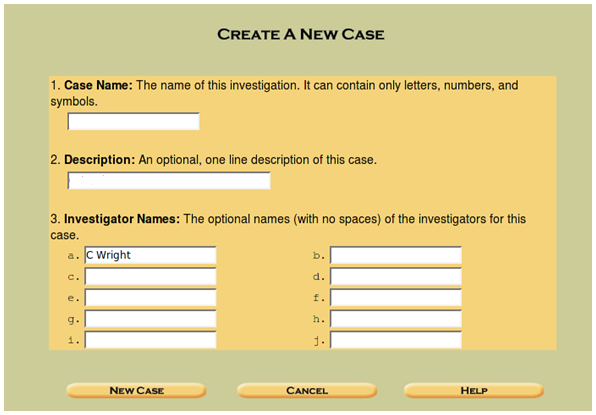
Begin by entering the details about the case. This will include the name of the Case itself and a description of the case. For this, you should have a means of identifying cases. An example could be something along the lines of "<Company>.<Instance>" if you do external consulting as I do or it could be related to specific designations within a company.You will see the message (displayed in Step 4) when the case file is created.
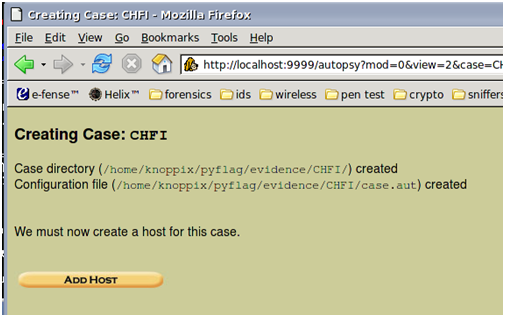
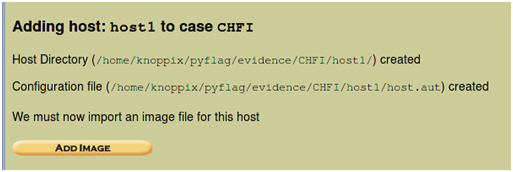
In the example above, we see an example case I created for a CHFI course I created. This displays where the evidence is located on the system.
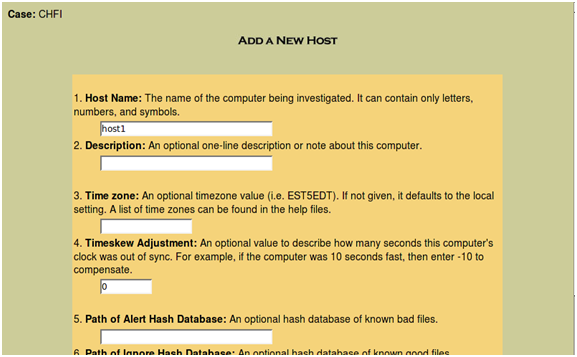
Click "Add Host" and you will be presented with a screen (above) that allows you to add the host and a description. As it states, the Timezone and skew can be configured. Also, you can add and use a list of known good or known bad hashes. This can be as complex as the NSRL lists or as simple as a hashed list of your own organizations "known good" files. Lists of known rootkits and other Malware can be added as a known bad list.
Where a time skew is known, you can also add this in advance.
Next, add the disk image by pressing the Add Image button (Example /home/CHFI.img. Autopsy allows you to use an image that you have already captured. This can be an image of the disk using the dd command for instance). You can also use Autopsy to capture an image, but this is not covered in this post.

The "Add Image" screen allows us to import the image that we are going to analyze in Autopsy.
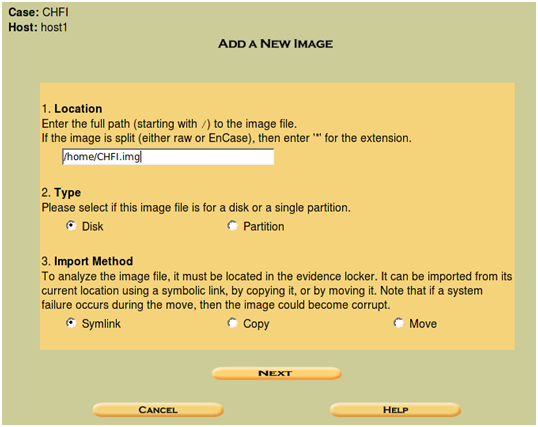
This will allow us to import an image into our evidence locker. Rather than working on the original image, you can select the move option to copy the image to the analysis host and have a separate copy of the image for use in Autopsy.
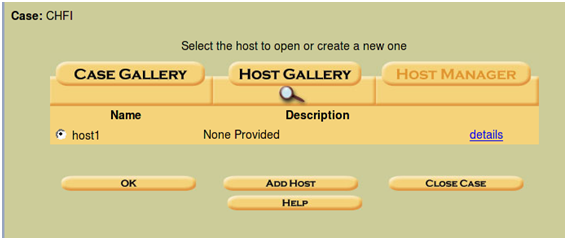
As you add hosts to the case, these will be displayed in the "Case Gallery". When you now go back to the Case Gallery and view your options, you will be presented with the options displayed in Step 10.

You should work with various features of Autopsy browser and experiment with these in order to become familiar with the options and functionality. Try the other options and analyze an image to gain experience with the tool.
The primary modes and functions of the Autopsy Forensic Browser are to act as a graphical front end to the Sleuth Kit and other related tools in order to provide the capabilities of analysis, search and case management in a simple but comprehensive package. This collection of tools creates a simple, yet powerful forensic analysis platform.
A dead analysis occurs when a dedicated analysis system is used to examine the data from a suspect system. When this occurs, Autopsy and The Sleuth Kit are run in a trusted environment, typically in a lab. Autopsy and TSK provides support for raw, Expert Witness, and AFF file formats.
A live analysis occurs when the suspect system is being analyzed while it is running. In this case, Autopsy and The Sleuth Kit are run from a CD in an untrusted environment. This is frequently used during incident response while the incident is being confirmed. Following confirmation, the system is acquired and a dead analysis performed.
The Autopsy Browser provides the following evidence search functionality:
Autopsy provides a number of functions that aid in case management. In particular, investigations started within autopsy are organized by cases, which can contain one or more hosts. Each host is configured to have its own time zone setting and clock skew so that the times shown are the same as the original user would have seen. Each host can contain one or more file system images to analyze. The following functions within Autopsy are specifically designed aid in case management:
Autopsy is available from http://www.sleuthkit.org/autopsy.
Craig Wright is a Director with Information Defense in Australia. He holds both the GSE-Malware and GSE-Compliance certifications from GIAC. He is a perpetual student with numerous post graduate degrees including an LLM specializing in international commercial law and ecommerce law as well as working on his 4th IT focused Masters degree (Masters in System Development) from Charles Stuart University where he is helping to launch a Masters degree in digital forensics. He starts his second doctorate, a PhD on the quantification of information system risk at CSU in April this year.
